| Stress | — |
| Deflection | — |
| Strain | — |
| Safety Factor | — |
| Part Weight | — |
Building something reliable starts with understanding how materials behave under pressure. Whether it is a simple shelf for a garage or a more complex structural beam, knowing if the material will snap or bend too much is the difference between a successful project and a costly failure. This 3D Strength and Deformation Simulator provides a visual and mathematical way to test ideas before buying any lumber or steel. This guide explains how to use the tool and provides the reference data needed to make smart decisions.



Table of Contents
Getting Started with the Simulator
The interface is designed to be intuitive, but getting the most out of it requires a basic understanding of the inputs. The tool calculates two main things: Stress and Deflection. Stress tells you if the material will break, while Deflection shows how much it will sag.
Step 1: Choose Your Material
Different materials have different levels of stiffness and strength. In the simulator, selecting a material automatically sets the Modulus of Elasticity and the Yield Strength. Steel is very stiff and strong, while wood is much more flexible and has lower breaking points. Start by picking the material that matches your actual build plan.
Step 2: Define the Shape and Load Type
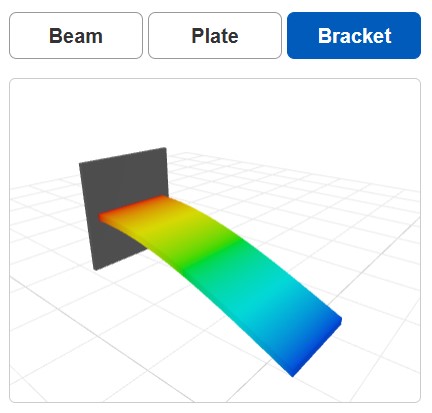
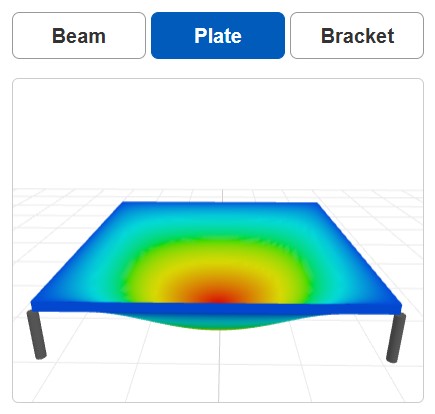
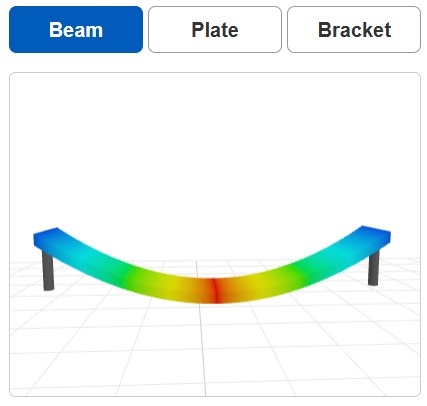
The simulator supports various configurations. You can choose between a standard beam supported at 2 ends or a bracket fixed to a wall. The way you apply weight also matters. A point load in the center acts differently than weight spread evenly across the entire surface. Select the icon that best represents your real-world scenario.
Step 3: Enter Dimensions and Force
Precision is key here. For users in the United States, switching to Imperial units allows for inputs in inches and pounds-force. Adjust the sliders or type in the exact numbers for length, width, and thickness. The 3D preview updates in real-time, showing a representation of how the object will look. If the numbers turn red, it means the material is likely to fail under the given conditions.
Reference Data: Material Properties
To use the simulator effectively, it helps to know what the numbers for Modulus of Elasticity and Yield Strength actually mean. The following table provides standard values for common materials used in construction and DIY projects. All values are approximate as specific grades of material can vary.
| Material Type | Elastic Modulus, psi | Yield Strength, psi | Common Use Case |
|---|---|---|---|
| Structural Steel (A36) | 29000000 | 36000 | House frames, heavy brackets |
| Aluminum (6061-T6) | 10000000 | 35000 | Lightweight frames, shelving |
| Pine Wood (Softwood) | 1200000 | 4000 | Furniture, wall studs |
| Oak Wood (Hardwood) | 1800000 | 8000 | High-end furniture, flooring |
| Acrylic (Plastic) | 450000 | 10000 | Transparent panels, displays |
| Copper | 17000000 | 10000 | Electrical and plumbing tasks |
| Concrete (Standard) | 3600000 | 3000 | Foundations and posts |

How Much Bend is Too Much?
Just because a beam does not break does not mean it is working correctly. A floor that bounces or a shelf that sags 2 inches looks bad and can be dangerous. In the engineering world, this is called the deflection limit. Most building codes use a ratio based on the length of the span. For example, a limit of L/360 means the deflection should not exceed the length divided by 360.
| Application Type | Recommended Limit | Example for 120 inch Span |
|---|---|---|
| Floors with Plaster Ceilings | L / 360 | 0.33 inches |
| General Roof Rafters | L / 240 | 0.50 inches |
| Utility Shelving | L / 180 | 0.66 inches |
| Cantilever Brackets | L / 120 | 1.00 inches |
Simplified Math Behind the Scenes
You do not need to be a math expert to use the tool, but knowing the basic relationships helps in troubleshooting a design. The simulator uses standard physics equations to determine how the material reacts. Here are the core concepts in a simple format:
- Moment of Inertia: This represents how much a shape resists bending. For a rectangular beam, it is calculated as: (Width * Thickness * Thickness * Thickness) / 12. Notice that thickness is cubed, which means doubling the thickness makes the beam 8 times stiffer.
- Bending Stress: This is the internal pressure on the material. It is calculated as: (Bending Moment * Distance from Center) / Moment of Inertia. If this value exceeds the Yield Strength, the material deforms permanently.
- Max Deflection: This is the total sag at the weakest point. For a center load, the formula is: (Force * Length * Length * Length) / (48 * Elastic Modulus * Moment of Inertia).
Practical Example: The Garage Shelf
Imagine building a shelf using a piece of Pine wood. The shelf is 16 inches long, 3 inches wide, and 0.5 inches thick. You plan to put a heavy tool box in the center that weighs 225 lbs.
✍ First, enter 16 into the Length field. Set the Width to 3 and the Thickness to 0.5. Apply a Load of 225 lbf. The simulator will show that for such a thin piece of wood, 225 lbs is far too much. The stress will likely exceed 4000 psi, and the sag will be very noticeable. To fix this, you could increase the thickness to 1.5 inches. By doing this, the Moment of Inertia increases significantly, the stress drops to safe levels, and the deflection becomes almost invisible to the eye.
Best Practices for Accurate Results
To get the most realistic data from the simulator, follow these simple rules:
- Use actual dimensions: Remember that a 2×4 board is actually 1.5 inches by 3.5 inches. Always enter the real measured dimensions, not the nominal names.
- Account for safety: Never design right up to the limit of the Yield Strength. Professional designers usually aim for a factor of safety of at least 2, meaning they design the part to be 2 times stronger than the absolute minimum required.
- Consider the Span: The Span is the distance between the supports. If you have a 48 inch board but the legs of the table are only 30 inches apart, use 30 for your Span input to get the correct deflection results.
- Check the Units: Double-check if you are in Metric or Imperial mode. Mixing up millimeters and inches will result in completely wrong calculations.
The 3D Strength and Deformation Simulator is a powerful ally for any DIY builder or student. By testing different materials and thicknesses virtually, you save time and prevent accidents. Start with a conservative design, check the deflection limits against the tables provided above, and always prioritize safety over saving a few cents on material thickness.
Literature
- Hibbeler, R. C. Mechanics of Materials. 10th Edition, Pearson, 2016.
- American Wood Council. National Design Specification (NDS) for Wood Construction. 2018.
- AISC. Steel Construction Manual. 15th Edition, American Institute of Steel Construction, 2017.
- Gere, J. M., and Goodno, B. J. Mechanics of Materials. 9th Edition, Cengage Learning, 2017.

David Parry — Senior Engineering Analyst
Specializing in electronics and physics-based simulations with 20+ years of engineering experience. David ensures the mathematical and physical accuracy of the tools at ProCalcLab.


