| Total Tiles | 0 pcs |
| Number of Layers | 0 |
| Package Height | 0 in |
| Tiles Volume | 0 in³ |
| Package Volume | 0 in³ |
| Packing Density | 0% |
Planning a construction project or managing warehouse logistics requires precise material calculations. Ordering too little halts a job timeline, while over-ordering ties up budget and storage space. The Tile Box and Quantity Calculator eliminates guesswork by providing an interactive visual method to determine exactly how many tiles fit inside a specific package. This guide explains how to operate the tool effectively and offers practical reference data for material packing, shipping, and handling.


Table of Contents
Core Features of the Estimating Tool
This digital instrument calculates the spatial relationship between individual building materials and their outer packaging. The interface relies on a 3D visualization model that updates instantly based on entered dimensions. Users can observe how tiles stack layer by layer inside a crate or cardboard box. The system supports both rectangular and round shapes, accommodating standard floor tiles, subway tiles, or specialized cylindrical ceramic pieces.
💻 The layout features two primary calculation modes. The first mode calculates capacity based on the total volume of the box. The tool fills the package to its maximum height constraint. The second mode calculates the required box height based on a specific target quantity of tiles. If a manufacturer needs to ship exactly 50 pieces per box, this mode dictates exactly how tall the packaging must be to fit the entire batch.
Step by Step Usage Instructions
Using the interface involves entering basic geometric values. All inputs operate in imperial units by default, measuring in inches. Sliders allow for rapid visual adjustments, while numeric input fields provide pinpoint accuracy.
- Begin by selecting the measurement system. Ensure the Imperial button is active for calculations in inches. Next, select the tile shape. Rectangular fits most standard projects, while the round option handles cylindrical formats.
- Choose the calculation direction. Selecting By Volume tells the program to maximize the space inside a fixed box. Selecting By Quantity allows the program to adjust the box height based on a requested number of tiles.
- Input the package dimensions. Enter the maximum allowed length, width, and height of the outer box. If working in By Quantity mode, the height field becomes locked as the program will calculate this value automatically.
- Input the tile dimensions. Enter the exact length, width, and thickness of a single piece. For round tiles, the length field transforms into a diameter input.
Observe the results table. The system generates hard data regarding the total pieces that fit, the number of stacked layers, total tile volume, total package volume, and the overall packing density percentage. A high density percentage indicates efficient space utilization.
Mathematical Foundations of Packing Logistics
Understanding the math behind the interface helps verify material orders. The tool relies on basic geometry to determine spatial limits. Calculations ignore complex variables like packaging padding to provide raw theoretical capacities.
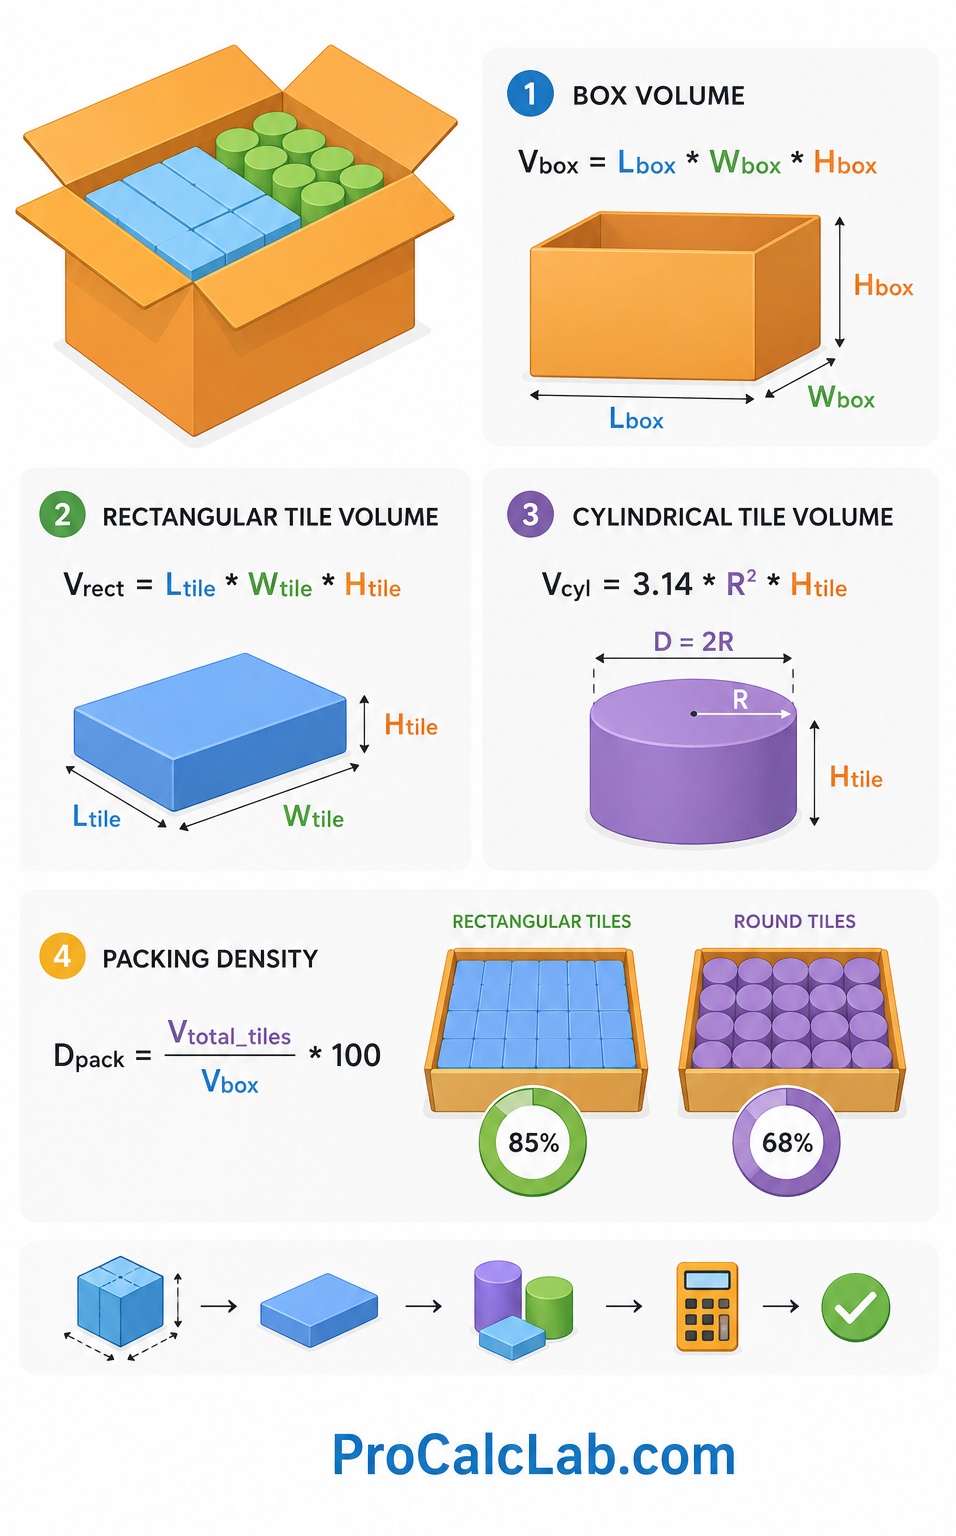
To find the total volume of the outer box, multiply its 3 primary dimensions. The result is expressed in cubic inches.
Vbox = Lbox * Wbox * Hbox
Calculating the volume of a single rectangular tile follows the exact same logic.
Vrect = Ltile * Wtile * Htile
For cylindrical or round tiles, the formula shifts to calculate the area of a circle multiplied by the piece thickness. The radius is exactly half of the diameter.
Vcyl = 3.14 * R2 * Htile
Packing density reveals how much empty air remains inside the box. Round tiles naturally create more void space than rectangular ones. The density formula divides total material volume by total package volume, then multiplies by 100 to find the percentage.
Dpack = Vtotal_tiles / Vbox * 100
Practical Application Example
✍ Consider a scenario where a supplier needs to package custom stone tiles into wooden shipping crates. The crate interior measures 24 inches in length, 18 inches in width, and 12 inches in height. The stone tiles measure 6 inches in length, 6 inches in width, and 0.5 inches in thickness.
First, determine how many pieces fit flat on the bottom of the crate. Divide the crate length by the tile length. 24 / 6 = 4 pieces along the edge. Next, divide the crate width by the tile width. 18 / 6 = 3 pieces along the side. Multiply these figures to find pieces per layer.
Pieces per layer = 4 * 3 = 12
Next, determine how many layers can stack vertically before hitting the crate lid. Divide the crate height by the tile thickness.
Total layers = 12 / 0.5 = 24
Finally, multiply the pieces per layer by the total layers to find the absolute maximum capacity of the shipping crate.
Total capacity = 12 * 24 = 288 pieces
If the supplier requires exactly 150 pieces per crate for weight limits, the calculation runs in reverse. Divide 150 by 12 pieces per layer to get 12.5 layers. Since layers must be whole numbers, the crate needs 13 layers. Multiply 13 layers by 0.5 inches thickness to find a minimum required crate height of 6.5 inches.
Common Tile Dimensions and Box Capacities
Manufacturers adhere to standard sizing to streamline shipping and installation. The table below outlines typical rectangular and square dimensions found in American construction, along with average pieces per standard commercial carton. Values represent standard industry practices rather than strict absolute rules.
| Tile Size in Inches | Typical Application | Average Pieces per Box |
|---|---|---|
| 1 * 1 | Mosaic sheets | 100 |
| 2 * 2 | Shower floors | 50 |
| 3 * 6 | Classic Subway wall | 80 |
| 4 * 4 | Kitchen backsplash | 100 |
| 4 * 8 | Elongated Subway | 50 |
| 6 * 6 | Bathroom walls | 44 |
| 8 * 8 | Small floors | 30 |
| 12 * 12 | Standard residential floor | 15 |
| 12 * 24 | Modern linear floor | 8 |
| 16 * 16 | Large room floor | 10 |
| 18 * 18 | Commercial space | 8 |
| 24 * 24 | Expansive open layout | 4 |
| 6 * 24 | Wood plank imitation | 15 |
| 8 * 36 | Large wood plank | 8 |
| 10 * 40 | Premium large plank | 6 |
Material Properties and Shipping Weights
Volume calculations only solve half of the packaging equation. Weight constraints heavily influence logistics. A box filled to 100% volumetric capacity with dense natural stone might break cardboard packaging or exceed safe lifting limits for workers. Understanding material density ensures safe transport.
🧱 Ceramic represents the lightest standard option, fired at lower temperatures to create a slightly porous structure. Porcelain undergoes higher firing temperatures, resulting in a denser, heavier product with near zero water absorption. Natural stones like granite and marble carry the highest density.
The following table provides average weights based on material type for a standard 12 * 12 inch piece at 0.375 inches thickness. Figures are rounded for practical estimating.
| Material Type | Average Weight per Sq Ft, lbs | Durability Rating |
|---|---|---|
| Standard Ceramic | 3.5 | Moderate |
| Glazed Porcelain | 4.2 | High |
| Through-Body Porcelain | 4.5 | Extreme |
| Natural Marble | 5.5 | Variable |
| Polished Granite | 6.0 | Extreme |
| Natural Slate | 5.8 | High |
| Tumbled Travertine | 5.2 | Moderate |
| Glass Mosaic | 3.8 | Low to Moderate |
| Quarry Tile | 4.8 | High |
| Cement Encaustic | 5.0 | High |
| Terrazzo | 5.5 | Extreme |
| Limestone | 5.1 | Moderate |
| Sandstone | 4.9 | Moderate |
| Onyx | 5.3 | Low |
| Resin or Quartz | 4.0 | High |
Palletizing and Warehouse Storage Logistics
Once boxes are filled, they move to pallets. A standard American shipping pallet measures 48 inches by 40 inches. Arranging boxes onto pallets requires strategic planning to maximize stability and prevent product damage during transit.
Boxes should interlock like brickwork rather than stacking in straight vertical columns. Interlocking ties the load together, preventing tipping during forklift maneuvers. Cardboard edge protectors run vertically down the corners of the palletized load to distribute the pressure of the plastic stretch wrap. Shrink wrap must tightly bind the boxes to the wooden pallet base, not just to each other.
Total pallet weight dictates warehouse placement. Standard warehouse racking supports around 2500 pounds per level. A pallet of dense porcelain can easily exceed 3000 pounds, requiring floor storage rather than elevated rack placement. Exceeding rack limits causes catastrophic structural failure.
Temperature and humidity control impacts storage. While the ceramic materials themselves resist temperature changes, cardboard packaging absorbs moisture from humid air. Weakened cardboard collapses under the weight of stacked pallets. Warehouses in humid climates must utilize shrink wrap across the top surface to block ambient moisture.
Factoring Breakage and Overage Allowances
Theoretical box capacity never equals perfect field reality. Material handling invariably results in a small percentage of chipped corners or cracked centers. Furthermore, the installation process requires cutting pieces to fit against walls, cabinets, and plumbing fixtures. These cuts generate unusable waste material.
📉 Industry standards dictate purchasing a minimum of 10% overage beyond the calculated square footage. For complex layouts featuring diagonal herringbone patterns or rooms with numerous angles, the overage requirement jumps to 15% or even 20%.
When calculating final box requirements for an order, one must calculate the raw room area, add the overage percentage, and then divide by the coverage area provided per box. Always round up to the next full box. Manufacturers rarely sell partial boxes, and ensuring matching dye lots requires purchasing the entire batch at the same time. A later order of the exact same product line might feature a slightly different color tone due to separate firing batches in the kiln.
Grout Spacing and Coverage Expansion
While the packaging calculator deals strictly with raw material dimensions packed tightly together, the installed product behaves differently. During floor or wall installation, contractors leave intentional gaps between pieces for grout lines. These gaps absorb micro-movements in the subfloor and prevent the hard edges from grinding against one another and chipping.
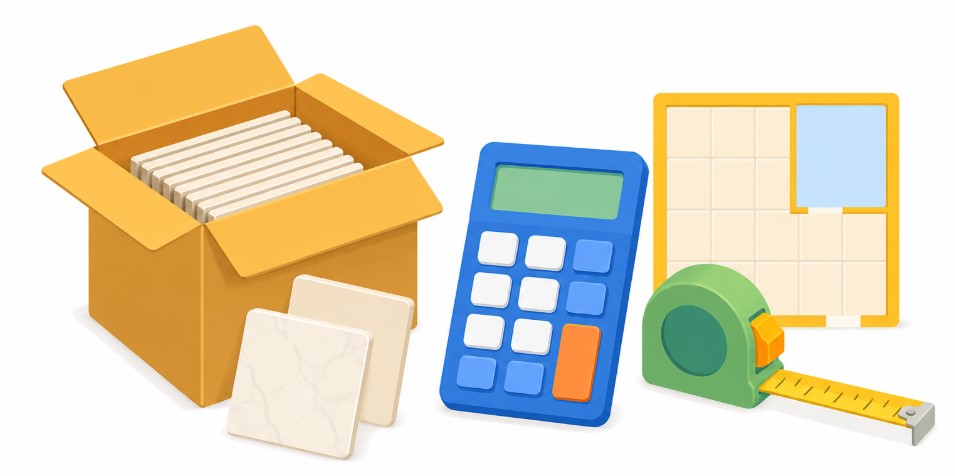
Grout lines effectively expand the coverage area of a single box. A box containing 10 square feet of raw ceramic material might cover 10.5 square feet of actual floor space when factoring in a 0.25 inch grout joint across the entire layout. However, most professionals ignore this slight coverage expansion during initial estimating, treating it as a hidden buffer against unexpected waste or breakage.
Literature
For professionals seeking deeper knowledge regarding masonry estimating, packaging optimization, and materials handling, the following American publications provide extensive technical guidelines.
- Walker’s Building Estimator’s Reference Book, 32nd Edition
- National Construction Estimator by Richard Pray
- RSMeans Estimating Handbook
- TCNA Handbook for Ceramic, Glass, and Stone Tile Installation
- Materials Handling Handbook by Raymond A. Kulwiec
- Construction Databook by Sidney M. Levy
- Modern Masonry: Brick, Block, Stone by Clois E. Kicklighter
- Architectural Graphic Standards by American Institute of Architects

David Parry — Senior Engineering Analyst
Specializing in electronics and physics-based simulations with 20+ years of engineering experience. David ensures the mathematical and physical accuracy of the tools at ProCalcLab.