A chimney is not a decorative extra. It is part of the heating system, and its height affects how the system behaves, how the roof layout looks, and how practical the final installation will be. A chimney that is too low can create draft problems and look awkward on the roof. A chimney that is too tall can be unnecessary, expensive, and visually out of place. This calculator gives a fast, simple way to estimate a chimney height without turning the task into a technical project.


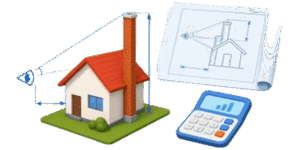
The purpose of the tool is straightforward: enter the main dimensions, pick the heating system and fuel, switch between imperial and metric units, and read a recommended chimney height. The 3D view shows the roof and chimney in a realistic way. The drawing shows the same layout in a cleaner, more technical format. Together, they make it easier to check whether the chimney fits the house instead of just trusting a single number.
Table of Contents
What this calculator is for
This calculator is best used during planning. It helps compare chimney options before construction, before a roof penetration is finalized, or before an installer confirms the final setup. It is also useful when a project needs a quick visual check and a simple height estimate.
| Use case | What the calculator helps with | Why it matters |
|---|---|---|
| New chimney planning | Choosing a sensible starting height | Prevents obvious layout mistakes early |
| Roof comparison | Seeing how chimney height changes with roof shape | Different roofs need different clearance |
| Appliance selection | Matching the chimney setup to boiler, stove, or fireplace | The heating source affects the recommended result |
| Visual review | Checking the chimney in 3D and in a drawing | Numbers alone are easy to misread |
| Quick reference | Getting a simple planning number fast | Saves time on rough estimates |
How to use it
Use the calculator in a fixed order. That keeps the result clean and avoids confusion.
- Select the heating system. Choose boiler, stove, or fireplace.
- Select the fuel type. Match the fuel to the appliance.
- Choose the unit system. Imperial is the default. Metric is available too.
- Enter the power. Put in the appliance power value.
- Enter the height to the roof. This is the main building height up to the roof line.
- Enter the distance to the ridge. This shows where the chimney sits on the roof.
- Enter the ridge height. This helps define the roof shape.
- Read the result. Check the recommended total height and the height above the roof.
The number fields and the sliders should be used together. The number fields are better for exact values. The sliders are better for quick adjustments. When both move together, the drawing and 3D view update instantly, which makes the result much easier to understand.
What each input means
| Input | Plain meaning | Why it matters |
|---|---|---|
| Heating system | Boiler, stove, or fireplace | Different systems usually need different planning choices |
| Fuel type | The fuel being burned | Fuel choice helps define the default power setup |
| Power | The output of the appliance | Higher power may justify a different chimney height target |
| Height to roof | Distance from the ground to the roof line | Forms the main part of the total chimney height |
| Distance to ridge | How far the chimney is from the roof ridge | Changes how much chimney needs to rise above the roof |
| Ridge height | How high the ridge rises above the roof line | Helps define the roof shape and the chimney position |
Why the unit switch matters
The calculator works in imperial and metric systems. Imperial is the default, which fits American-style planning better. Metric is included for users who think in meters.
| System | Typical use | Example unit |
|---|---|---|
| Imperial | Common in the United States | ft |
| Metric | Common in many other regions | m |
How the result should be read
The calculator usually returns more than one number. The most useful one is the recommended total chimney height. The next important number is the part of the chimney that sits above the roof. Both matter.
| Result | What it means | How to use it |
|---|---|---|
| Height above roof | How far the chimney extends above the roof surface | Useful for checking roof clearance and layout balance |
| Recommended total height | Total height from the ground to the chimney top | Main number for planning and comparison |
| Check message | Short note about whether the height looks acceptable | Quick way to spot an obvious issue |
The 2D drawing shows the geometry in a simple technical form. The 3D preview shows the same chimney on the house. A good result should make sense in both views.
Practical chimney height guidance
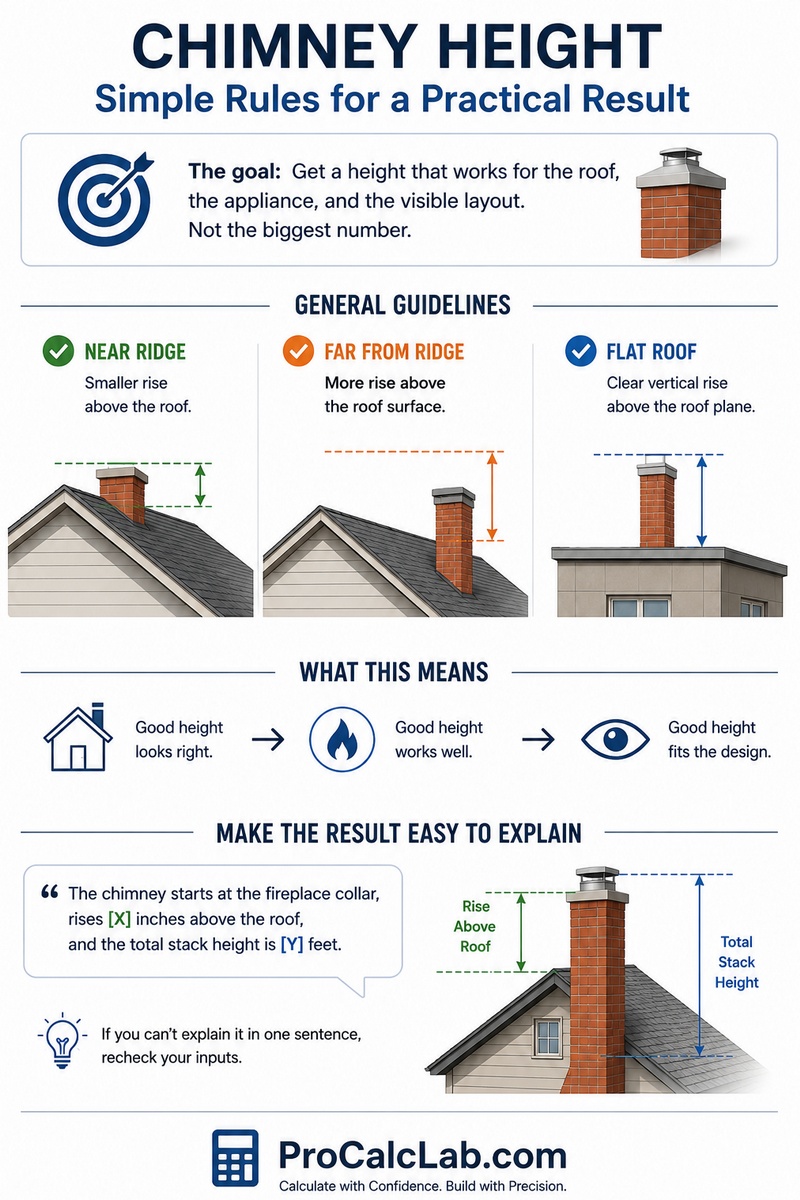
The main goal is not to chase the biggest chimney number. The goal is to get a height that works for the roof, the heating appliance, and the visible layout. A chimney usually needs enough rise above the roof to keep the design sensible and avoid a cramped look.
When the chimney is close to the ridge, the rise above the roof is usually smaller. When the chimney is farther from the ridge, it often needs more height above the roof surface. Flat roofs are different because there is no ridge to use as the visual reference. In that case, the chimney needs a clear vertical rise above the roof plane.
A practical result should be easy to explain in one sentence. It should say where the chimney starts, how high it sits above the roof, and how tall the full stack is. If the result cannot be explained that simply, the inputs probably need another look.
| Chimney position | Practical target | What that means |
|---|---|---|
| Close to the ridge | Smaller rise above the roof | The chimney does not need to stick up as much |
| Midway from the ridge | Moderate rise above the roof | The chimney should stay clearly visible above the roof line |
| Far from the ridge | Larger rise above the roof | More height is often needed to keep the layout clean |
| Flat roof | Clear vertical rise above the roof surface | The roof surface becomes the reference line |
What counts as a good result
✍ A good result is not just a number that looks plausible. It should make visual sense, match the roof shape, and look balanced in the drawing. If the chimney appears too short, too far out of place, or too tall for no reason, the setup should be reviewed.
The 3D preview is especially useful here. It shows whether the chimney looks naturally placed on the roof. The drawing is useful for checking clear height and the relationship between ridge, roof line, and chimney top.
| What to look for | Good sign | Bad sign |
|---|---|---|
| Roof clearance | Chimney clearly rises above the roof | Chimney sits too close to the roof line |
| Placement | Chimney looks balanced in the layout | Chimney looks awkward or misplaced |
| Total height | Height seems reasonable for the roof | Height seems excessive or too short |
| Visual clarity | Result is easy to understand in both views | Drawing and 3D view look inconsistent |
Simple planning logic behind the calculator
The calculator uses basic planning logic. It starts with the roof height, then adds the chimney part above the roof, and then adjusts the result based on chimney position and appliance setup.
The formulas below are kept simple on purpose.
Total chimney height
Htotal = Hroof + Habove roof
Chimney rise above the roof
Habove roof = roof clearance + ridge adjustment + appliance adjustment
Planning idea
The farther the chimney sits from the ridge, the more carefully the height should be checked.
These formulas are practical planning rules, not a substitute for local code, manufacturer instructions, or a site-specific professional decision.
Example
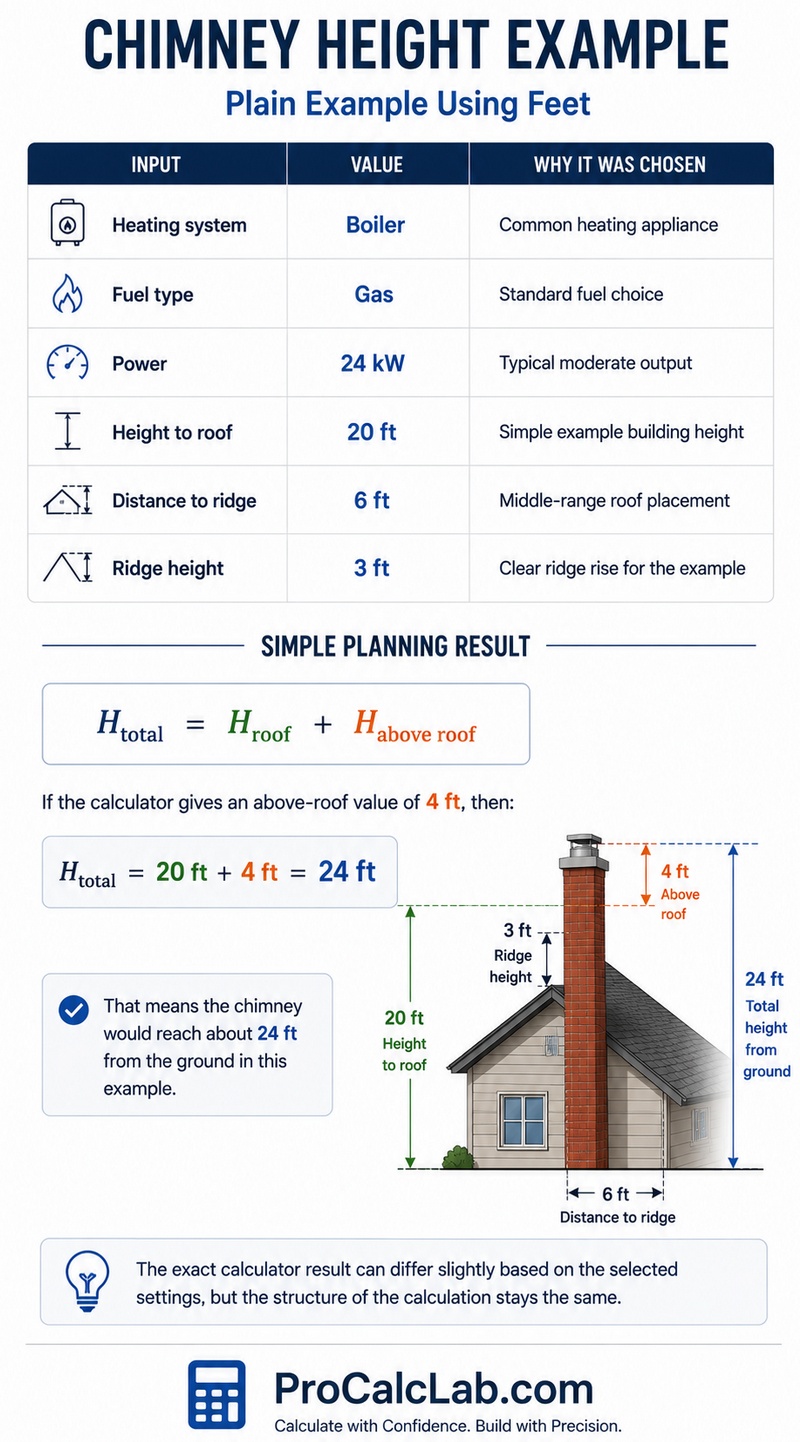
Here is a plain example using feet.
| Input | Value | Why it was chosen |
|---|---|---|
| Heating system | Boiler | Common heating appliance |
| Fuel type | Gas | Standard fuel choice |
| Power | 24 kW | Typical moderate output |
| Height to roof | 20 ft | Simple example building height |
| Distance to ridge | 6 ft | Middle-range roof placement |
| Ridge height | 3 ft | Clear ridge rise for the example |
A simple planning result might look like this:
Htotal = Hroof + Habove roof
If the calculator gives an above-roof value of 4 ft, then:
Htotal = 20 ft + 4 ft = 24 ft
That means the chimney would reach about 24 ft from the ground in this example. The exact calculator result can differ slightly based on the selected settings, but the structure of the calculation stays the same.
How the 3D view helps
The 3D view is useful when the roof is steep, when the chimney is set away from the ridge, or when the height feels borderline. It helps answer practical questions without making the user study a technical drawing for too long.
- Does the chimney sit naturally on the roof?
- Does the height look too short or too tall?
- Is the chimney placed in a logical spot?
- Does the roof shape support the chosen height?
How to avoid bad input choices
The calculator is only as good as the numbers entered into it. Wrong inputs create wrong results. That sounds obvious, but it is the most common problem with any height tool.
| Common mistake | What goes wrong | Better choice |
|---|---|---|
| Mixing imperial and metric values | The result becomes hard to trust | Keep one unit system from start to finish |
| Picking the wrong heating system | The setup no longer matches the appliance | Choose boiler, stove, or fireplace correctly |
| Ignoring the ridge distance | The chimney may look wrong on the roof | Enter the real chimney position on the roof |
| Using a rough roof height guess | The total height becomes less useful | Use a realistic building height value |
Practical recommendations for users
The best way to use this calculator is to start with the default values, then adjust the layout step by step. First, confirm the system and fuel. Then set the units. After that, enter the roof height and chimney placement. Read the result only after those inputs are correct.
⚠ The calculator is not meant to replace a final installation review. It is a planning tool. That makes it useful for early decisions, sketching, and comparing options. If two chimney locations both look possible, the drawing and 3D preview help narrow the choice quickly.
| Good habit | Why it helps | Simple rule |
|---|---|---|
| Check the units first | Prevents conversion errors | Do not mix ft and m |
| Use the real appliance type | Keeps the setup aligned with the project | Boiler is not the same as fireplace |
| Watch the roof placement | Helps the chimney look natural | Distance to ridge matters |
| Check both views | Catches issues fast | Do not rely on one number alone |
Who this calculator is useful for
This tool is useful for homeowners, installers, builders, and anyone who needs a fast chimney height estimate with a visual check. It is especially handy when the project is still in the planning stage and the goal is to get a sensible starting point instead of a final engineering package.
It also helps when comparing roof options. A small change in chimney placement can affect how the stack looks and how much it needs to rise above the roof. The calculator makes those comparisons easy to see without switching between a bunch of drawings and notes.
What to do after getting the result
Once the calculator gives a height, the next step is simple: compare the number with the roof drawing, then compare both with the 3D view. If the chimney looks balanced and the height seems reasonable, the result can be used as a planning reference.
If the result looks off, the issue usually comes from one of four places: wrong unit system, wrong appliance type, inaccurate roof height, or poor chimney placement relative to the ridge. Checking those four things fixes most problems.
| Result check | What it should show | What to fix if it does not |
|---|---|---|
| Height above roof | Clear rise above the roof surface | Review distance to ridge and ridge height |
| Total height | Sensible overall stack height | Check roof height and unit selection |
| 3D preview | Balanced, realistic placement | Adjust the chimney position inputs |
| Drawing | Clean relationship between roof and chimney | Recheck all entered dimensions |
Summary
The Chimney Height Calculator with 3D Visualization and Drawing is a practical planning tool for chimney layouts. It gives a recommended height, shows the result in a 3D preview, and backs it up with a technical drawing. The interface is simple enough for quick use, but still detailed enough to help with real planning. For the best result, use the correct heating system, the correct fuel, the correct unit system, and realistic roof measurements. Then read the number, compare it with the drawing, and confirm that the chimney looks right in 3D. That is the cleanest way to use the tool and the fastest way to avoid obvious mistakes.
References
- NFPA 211, Standard for Chimneys, Fireplaces, Vents, and Solid Fuel-Burning Appliances
- International Residential Code chimney and venting sections
- Manufacturer installation manuals for boilers, stoves, and fireplaces
- Local building code and inspection guidance
- Site-specific roof and venting plans from qualified professionals

Markus Fletcher — Structural Design Specialist
Expert in structural integrity, 3D modeling, and applied mathematics. Markus focuses on creating precise tools for construction professionals and DIY engineers.


