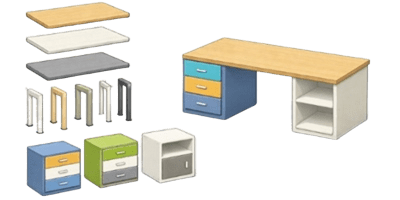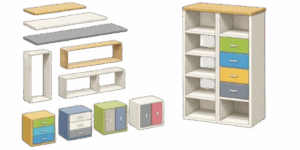
This tool lets you sketch a shelf or bookcase on a grid, set real world dimensions in inches, pick material thickness, and see a live 3D preview. Use it to test proportions, swap depths and spacing, and prepare an image to share with a builder. Start simple and iterate, then lock in the design for cutting and assembly.



What you can do
- Draw a shelf outline directly on the grid
- Set sizes in inches and fractions for US friendly plans
- Adjust shelf thickness and depth with instant feedback
- Rotate the 3D model to inspect all sides
- Apply color or upload a wood texture to preview finishes
- Export a PNG of the 3D view plus dimensioned drawing
Begin with rectangles to get your basic layout. After the basic box feels right, add inner shelves, vertical dividers, or open cubes. The 3D view helps you spot interference and awkward clearances before you cut a single board.
How the editor works
The center area is a snap-to-grid drawing board. Click to add a vertex, then click again to create an edge. Keep adding edges to close the loop into a full shelf contour. Every point snaps to grid increments to keep dimensions clean and repeatable.
Drawing steps
- First click creates the start point
- Second click sets the first edge
- Continue clicking to trace the full outline
- Drag any point to nudge geometry; press Delete to remove a selected edge
Lines and points remain editable so you can refine the shape at any time. Use the undo button if you overshoot while sketching.
Grid scale and units
Set the grid cell size to match how you want to work in inches. Common choices are three eighths inch per cell for fine detail, one inch per cell for general furniture, and two inches per cell for large storage units. All dimensions on the plan and in the 3D viewer follow the chosen scale.
| Grid cell | Typical use |
|---|---|
| 3/8″ | Fine layout and trim details |
| 1″ | General furniture and shelving |
| 2″ | Large industrial racks and roomy cabinets |
Material thickness and shelf depth
Choose a realistic material thickness for the look and strength you need. Standard US options work well with the app.
| Material | Typical thickness |
|---|---|
| Particleboard or melamine | 5/8″ to 3/4″ |
| Plywood | 1/2″ to 3/4″ |
| Solid hardwood | 3/4″ to 1″ |
Shelf depth depends on purpose. Book shelves look best at 10 to 12 inches, shoe shelves use 12 to 14 inches, storage racks often need 14 to 20 inches. Adjust these values until the 3D model shows comfortable spacing for your items.
3D preview and inspection
Every change on the drawing board updates the 3D window. You can orbit the model with the mouse, zoom in to check shelf edges, and view true thickness so you know how the piece will sit against the wall. The model auto centers for easy framing.

Pick a solid color or upload a texture for a realistic surface. Textures tile across faces to show grain direction and reveal seams. Preview edge banding and paint options to decide if a raw panel or finished look suits your plan.
Cleanup and export
- Select a line and hit Delete to remove segments
- Use Clear to reset the whole project
- Export PNG to share with a client or fabricator
The exported image contains the 3D view and a dimensioned top or front projection depending on your current workspace. That makes it simple to hand a visual to a contractor or include it in a quote.
Practical tips and fabrication notes
Keep these checks in mind before you finalize the cutting list. Add edge banding allowance for visible cuts. If you plan to hang the unit, include a back cleat or keyhole slots. For heavy loads add intermediate vertical supports or thicker shelves. Confirm door and drawer clearances if the shelf will sit near trim or other furniture.
👉 Fasteners and assembly choices affect strength and finish. Use dowels for invisible joints, confirmat screws for particleboard, and pocket screws for quick assembly. Pre-drill holes when using hardwood to avoid splitting. Label parts in the export to speed up assembly.
Safety and mounting
Always anchor tall units to studs to prevent tipping. Choose mounting hardware rated for the expected load. If the bookcase will carry heavy equipment distribute weight across shelves and avoid cantilevered loads without reinforcement.
Example setups in inches
| Use | Depth |
|---|---|
| Books | 10″ to 12″ |
| Shoes | 12″ to 14″ |
| Bulk storage | 14″ to 20″ |
When you design for real use add 1 inch of clearance if you expect larger formats or boxes. That small buffer saves headaches when you place items on finished shelves.
Final thoughts
This designer helps you move from concept to a practical plan in minutes. It reduces guesswork, improves communication with makers, and cuts down wasted material. Tweak proportions in 3D, double check thickness and mounting details, then export a clear image for production.
Recommended reading
- “The Complete Book of Woodworking” by Tom Carpenter
- “Cabinetmaking and Millwork” by John White
- “Woodworking Basics” by Peter Korn
- “Understanding Wood: A Craftsman’s Guide to Wood Technology” by R. Bruce Hoadley
- “Shop Drawings for Craftsman Furniture” by Ernest Joyce

Markus Fletcher — Structural Design Specialist
Expert in structural integrity, 3D modeling, and applied mathematics. Markus focuses on creating precise tools for construction professionals and DIY engineers.